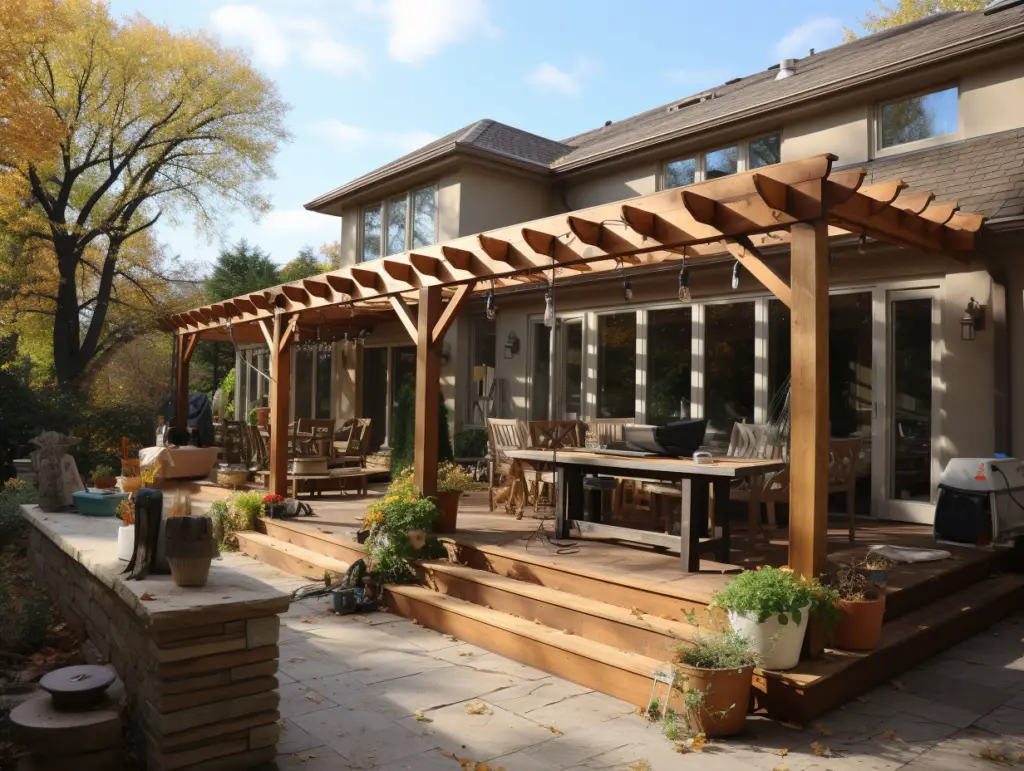
When it comes to adding a patio roof to your existing house, there are a few things to consider. A patio roof provides shelter from the sun and rain, making your outdoor living space more comfortable and functional. However, attaching a patio roof to an existing house requires careful planning and execution to ensure that it is safe, secure, and meets local building codes.
Understanding the basics of how to attach a patio roof to an existing house is crucial before you start the project. You will need to determine the type of roof you want to install, as well as the materials and tools required.
Pre-construction planning is also essential, as you will need to obtain any necessary permits and ensure that your design meets local building codes. Additionally, preparing the existing house for the patio roof installation is critical to ensure that it is attached securely and safely.
Key Takeaways
- Proper planning and preparation are essential when attaching a patio roof to an existing house.
- Understanding the basics of patio roof installation, including the materials and tools required, is crucial.
- Following local building codes and obtaining necessary permits is necessary for a safe and secure patio roof installation.
Understanding the Basics
If you’re looking to add an outdoor living space to your existing house, attaching a patio roof can be a great option. However, before you begin, it’s important to understand the basics of patio roof design and attaching a patio roof to an existing house.
Firstly, you need to determine the type of patio roof that best suits your needs. There are many different types of patio roofs, including gable, hip, flat, and shed roofs. Each type has its own benefits and drawbacks, so it’s important to consider factors such as the climate in your area, the style of your house, and your budget.
Once you’ve decided on the type of patio roof you want, you need to ensure that your existing house can support the weight of the new addition. This involves assessing the structure of your home, including the exterior walls where you plan on attaching the patio roof ledger board. It’s important to ensure that everything is up to code and that the roof is properly flashed to prevent water damage.
When it comes to attaching a patio roof to an existing house, there are several methods you can use. One popular method is to attach the ledger board directly to the house using lag screws or bolts. Another option is to use a freestanding patio cover, which doesn’t require any attachment to the house.
Overall, attaching a patio roof to an existing house requires some knowledge of patio roof design and construction. However, with the right tools and techniques, you can create a beautiful outdoor living space that adds value to your home.
Materials and Tools Required
Attaching a patio roof to an existing house requires the use of specific materials and tools to ensure that the project is safe and sturdy. Here are the materials and tools required for this project:
Materials
- Lumber: The type of lumber used for the project depends on the design of the patio roof. Most patio roofs use pressure-treated lumber for the beams, rafters, and posts.
- Metal Brackets: Metal brackets are used to attach the patio roof to the existing house. They come in different sizes and shapes, and their selection depends on the design of the patio roof.
- Lag Bolts: Lag bolts are used to attach the metal brackets to the house’s framing. They come in different sizes and lengths, and their selection depends on the thickness of the framing.
- Roofing Material: The roofing material used for the patio roof depends on the design of the patio roof. It can be asphalt shingles, metal panels, or polycarbonate panels.
- Roofing Felt: Roofing felt is used as an underlayment for the roofing material. It helps to protect the roof from moisture.
- Oriented Strand Board (OSB): OSB is used as the roof sheathing. It provides a stable base for the roofing material.
- Galvanized Nails: Galvanized nails are used to fasten the roofing material and the OSB to the rafters.
Tools
- Screwdriver: A screwdriver is used to install the metal brackets and the lag bolts.
- Nail Gun: A nail gun is used to fasten the OSB to the rafters.
- Utility Knife: A utility knife is used to cut the roofing felt and the roofing material.
- Table Saw: A table saw is used to cut the lumber to the required dimensions.
- Planks: Planks are used as temporary supports during the installation of the patio roof.
- Anchor Bolts: Anchor bolts are used to secure the posts to the ground. They come in different sizes and lengths, and their selection depends on the soil type and the height of the posts.
- Expanding Anchor Bolts: Expanding anchor bolts are used to attach the metal brackets to the masonry walls. They provide a secure and stable connection.
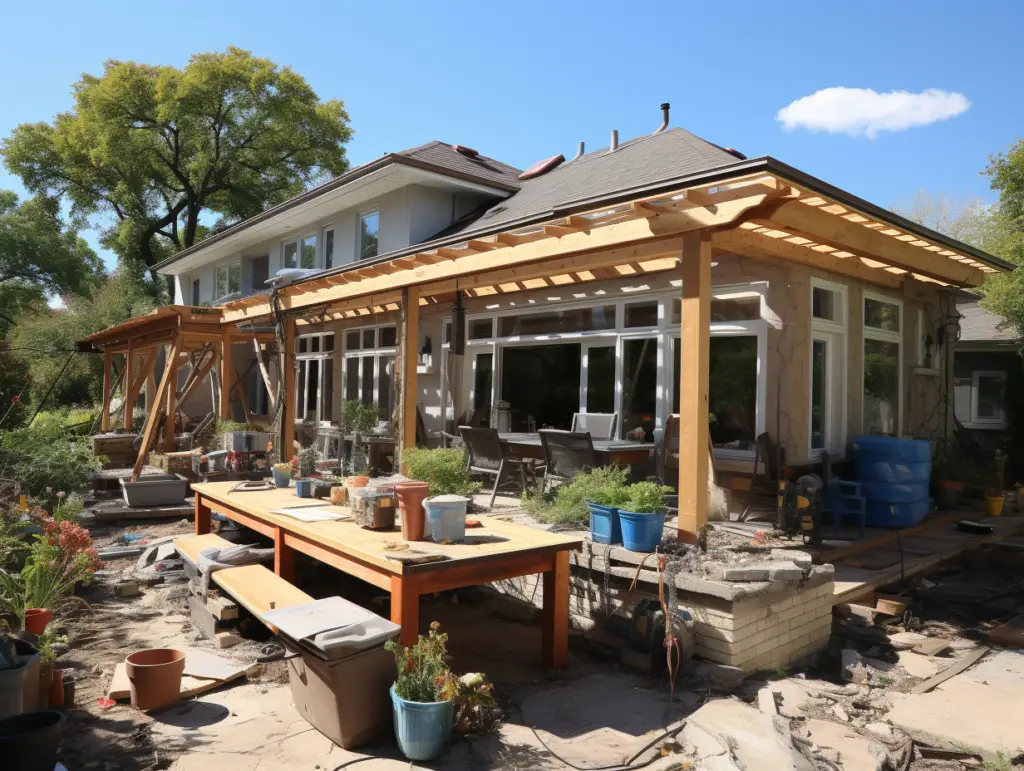
Pre-Construction Planning
Before starting a patio roof installation project, it is important to plan and prepare for the construction process. Proper planning can help ensure that the project is successful and meets all building codes and regulations. Here are some important factors to consider during the pre-construction planning phase:
Determine the Size and Structure of the Patio Roof
The size and structure of the patio roof will depend on the size of the existing house and the intended use of the outdoor living space. Consider the desired size, shape, and height of the patio roof. It is important to ensure that the patio roof does not obstruct any sightline clearance height or violate any building codes.
Choose the Right Materials
Carefully choose the materials for the patio roof. Consider the weight of the materials and the existing eave structure. Make sure that the materials are durable and can withstand the climate and sunlight in the area. Consult with an engineer if necessary.
Check Building Codes and Regulations
Check local building codes and regulations to ensure that the patio roof meets all requirements. This includes the size and pitch of the roof, the size and placement of the posts and footings, and the use of proper trusses and blocking.
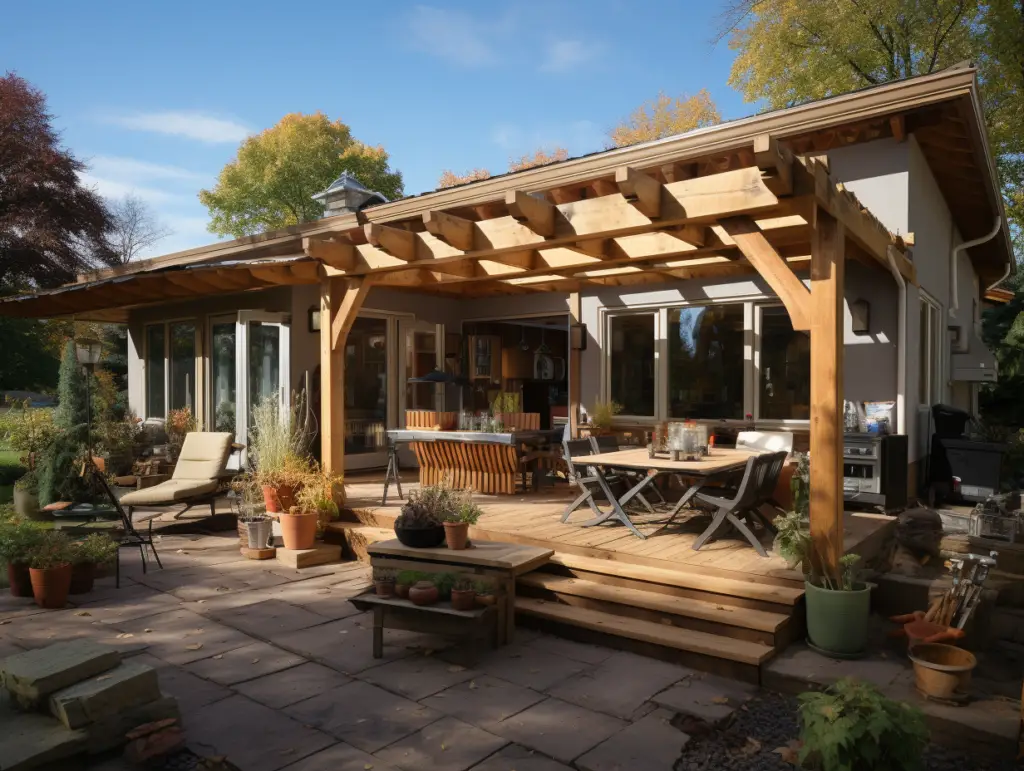
Install a Ledger Board
The ledger board is an important component of the patio roof structure. It provides support for the roof and attaches the roof to the existing house. Install the ledger board according to the manufacturer’s instructions and ensure that it is securely attached to the band joist or the side of the house. Make sure that the ledger board is level and that the sightline clearance height is not violated.
Consider Post Bases and Footings
The post bases and footings are also important components of the patio roof structure. They provide support for the posts and ensure that the patio roof is stable and secure. Make sure that the post bases and footings are installed according to the manufacturer’s instructions and meet all building codes and regulations. Consider the weight of the patio roof and the size of the footings when choosing the post bases and footings.
Install the Roof Structure and Trim
Install the roof structure and trim according to the manufacturer’s instructions. This includes the installation of the side rafter attachment, the patio roof slope, the support columns, the riser brackets, and the barge cap. Make sure that all components are securely attached and meet all building codes and regulations.
Overall, proper pre-construction planning is essential for a successful patio roof installation project. Careful consideration of the size and structure of the patio roof, the choice of materials, and adherence to building codes and regulations can help ensure that the patio roof is durable, stable, and meets all requirements.
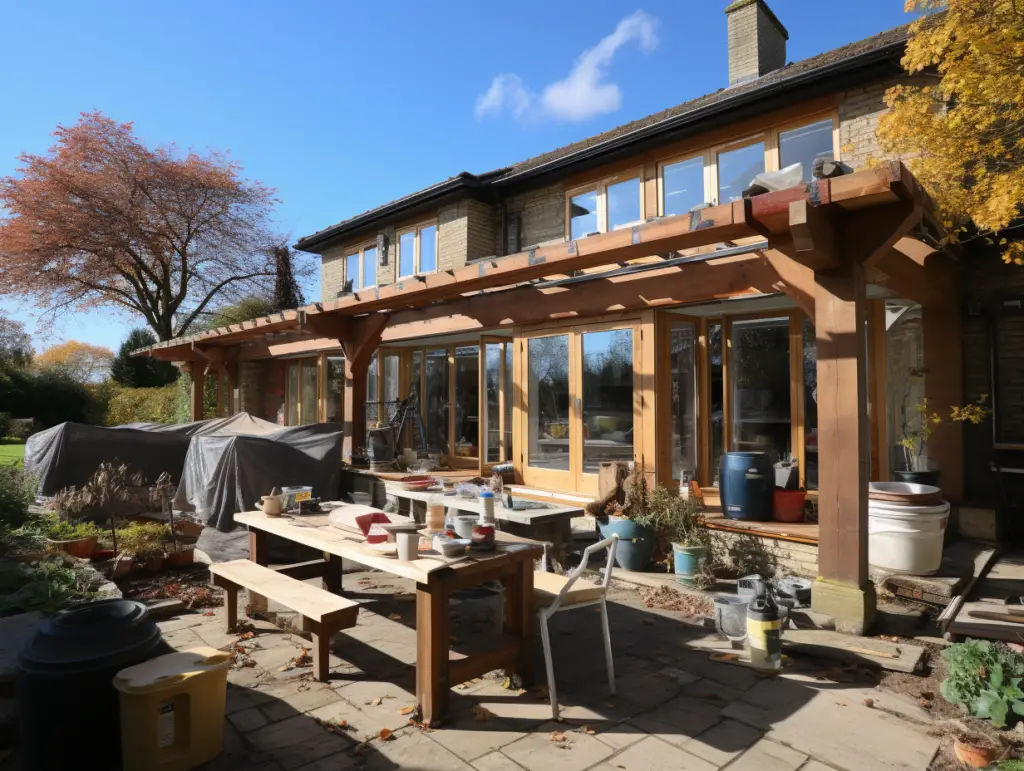
Preparing the Existing House

Before attaching a patio roof to an existing house, it is crucial to prepare the house to ensure the stability of the structure. This section will cover some of the essential steps to take to prepare the existing house.
Firstly, it is important to assess the integrity of the house’s structure. Check for any signs of rot or damage to the siding, masonry walls, or existing roof. Addressing these issues before attaching a patio roof can prevent any future problems.
Next, washers and caulk are necessary to prevent leaks and maintain the structure’s integrity. Use washers to secure the horizontal roof beam to the main beam and the gable roof to the existing roof. Caulk can be used to seal any gaps between the patio roof and the existing house.
It is also essential to consider the size of the beam required to support the patio roof. The beam size will depend on the size of the patio and the outdoor elements it will be exposed to. A professional with woodworking knowledge can help determine the appropriate beam size.
If the existing house has cedar siding or masonry walls, additional steps may be necessary to attach the patio roof. For example, a backchannel can be used to attach the patio roof to cedar siding, while a ledger board can be used for masonry walls.
Finally, regular repair and maintenance of the patio roof and existing house are crucial to ensure the structure’s longevity. Inspect the fascia boards and metal roof regularly for any signs of damage or wear and tear.
By taking the necessary steps to prepare the existing house, homeowners can ensure a stable and long-lasting patio roof.
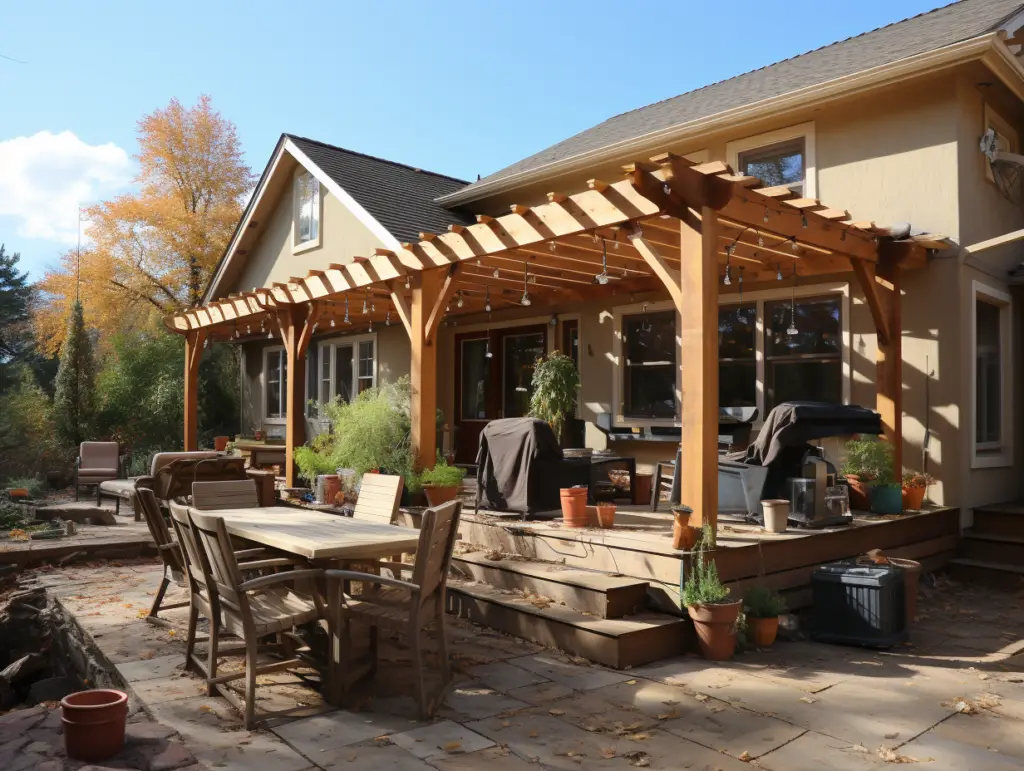
Attaching the Patio Roof
Attaching a patio roof to an existing house is a great way to extend your outdoor living space and add value to your home. However, it is important to ensure that the patio roof is properly attached to the house to prevent any damage or accidents. Here are some tips on how to attach a patio roof to an existing house.
Secure the Patio Cover
The first step in attaching a patio roof to an existing house is to secure the patio cover to the house. This is usually done by attaching a ledger board to the house. The ledger board is a long piece of wood that is attached to the house with bolts or screws. The patio cover is then attached to the ledger board.
Flashing
Flashing is an important part of attaching a patio roof to an existing house. Flashing is a piece of metal that is installed between the patio cover and the house. It is used to prevent water from getting into the house and causing damage. The flashing should be installed before the ledger board is attached to the house.
Gutter
Installing a gutter is also an important part of attaching a patio roof to an existing house. A gutter is used to collect water that runs off the patio cover and direct it away from the house. This helps to prevent water damage to the house.
Wooden Beams
Wooden beams are used to support the patio cover. The beams should be attached to the ledger board and the posts that support the patio cover. The beams should be spaced evenly to ensure that the patio cover is evenly supported.
Advantages
Attaching a patio roof to an existing house has several advantages. It provides shade and protection from the elements, which makes it a great place to relax and entertain. It also adds value to your home and can be a great selling point if you decide to sell your home in the future.
Installation Process
The installation process for attaching a patio roof to an existing house can be complex. It is important to follow the proper installation process to ensure that the patio cover is properly attached to the house. It is recommended to hire a professional to install the patio cover to ensure that it is done correctly.
In summary, attaching a patio roof to an existing house can be a great way to extend your outdoor living space and add value to your home. It is important to ensure that the patio cover is properly attached to the house to prevent any damage or accidents. Hiring a professional to install the patio cover is recommended to ensure that it is done correctly.
Frequently Asked Questions
How to attach a patio roof to an existing 2 story house?
Attaching a patio roof to an existing 2 story house requires careful planning and attention to detail. The first step is to determine the best location for the patio roof. Once you have chosen the location, you will need to install a ledger board to the house. The ledger board should be attached to the house using lag bolts or screws. Once the ledger board is in place, you can then install the rafters, beams, and roofing material.
How to build a porch roof attached to house?
Building a porch roof attached to a house requires careful planning and attention to detail. The first step is to determine the best location for the porch roof. Once you have chosen the location, you will need to install a ledger board to the house. The ledger board should be attached to the house using lag bolts or screws. Once the ledger board is in place, you can then install the rafters, beams, and roofing material.
Attaching patio roof to fascia?
Attaching a patio roof to the fascia of a house is not recommended. The fascia board is not designed to support the weight of a patio roof, and attaching a patio roof to the fascia can cause damage to the house. Instead, it is recommended that you install a ledger board to the house and attach the patio roof to the ledger board.
How to build patio cover not attached to house?
Building a patio cover that is not attached to a house requires careful planning and attention to detail. The first step is to determine the best location for the patio cover. Once you have chosen the location, you will need to install posts to support the patio cover. The posts should be installed in concrete footings to ensure stability. Once the posts are in place, you can then install the rafters, beams, and roofing material.
How to attach a roof ledger board to a house?
Attaching a roof ledger board to a house requires careful planning and attention to detail. The first step is to determine the best location for the ledger board. Once you have chosen the location, you will need to mark the location of the ledger board on the house. You will then need to drill holes in the house for the lag bolts or screws that will be used to attach the ledger board. Once the holes are drilled, you can then attach the ledger board to the house using lag bolts or screws.
How to attach a lean to roof to an existing roof?
Attaching a lean to roof to an existing roof requires careful planning and attention to detail. The first step is to determine the best location for the lean to roof. Once you have chosen the location, you will need to install a ledger board to the existing roof.
The ledger board should be attached to the existing roof using lag bolts or screws. Once the ledger board is in place, you can then install the rafters, beams, and roofing material for the lean to roof.


Leave a Reply